
Guide to Inspecting Your Gate’s Brakes
Checking your automated gate’s brakes is important for your safety and the safety of anyone who comes in contact with the gate. Brakes need to be checked on gates that get driven or walked through on a daily basis to ensure everything operates safely. The question is, how do you check your gate’s brakes?
First, you should do a visual inspection of your automatic gate. The best time to analyze your gate is after the gate has come to a complete stop and the motor has shut off. Does the gate move after the motor has shut off? If the gate stops as the motor has shut off, then it is safe to say that the brake is holding the gate from moving. When the gate has stopped moving you can also try to open or close the gate by hand. If you are able to move the gate by hand, the brake may be failing. If you cannot move the gate by hand and the gate does not move after the motor has shut off, then it is time to look inside the gate operator box.
If you don’t know what you’re looking at, the inside of an operator box may be very confusing. Below are a few pictures to help guide you. IMPORTANT: Do NOT stick your hands in the operator box without shutting the power off. All you should be doing is LOOKING. With the moving parts, belts and chains you can seriously injure yourself, so be very careful.
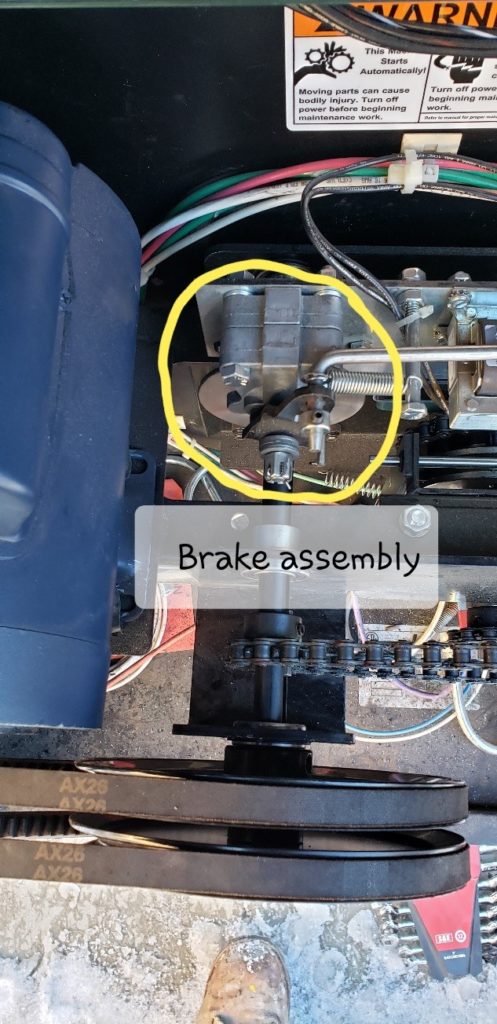

There is a little more to detecting whether the brake assembly is working correctly, so call a professional to check the assembly out. Until you get to that point, visually inspecting the brakes can help protect anyone who uses your gate entrance from getting hurt because of brake failure.